• Sunday 10am - 4pm
  • Monday CLOSED
  • Tuesday 10am - 6pm
  • Wednesday 10am - 6pm
  • Thursday 10am - 6pm
  • Friday 10am - 6pm
  • Saturday 10am - 5pm

The 4 Stages Of Harley's Screamin' Eagle Upgrades

Posted by Dan Novit

Feb 22, 2019, 9:33:36 AM

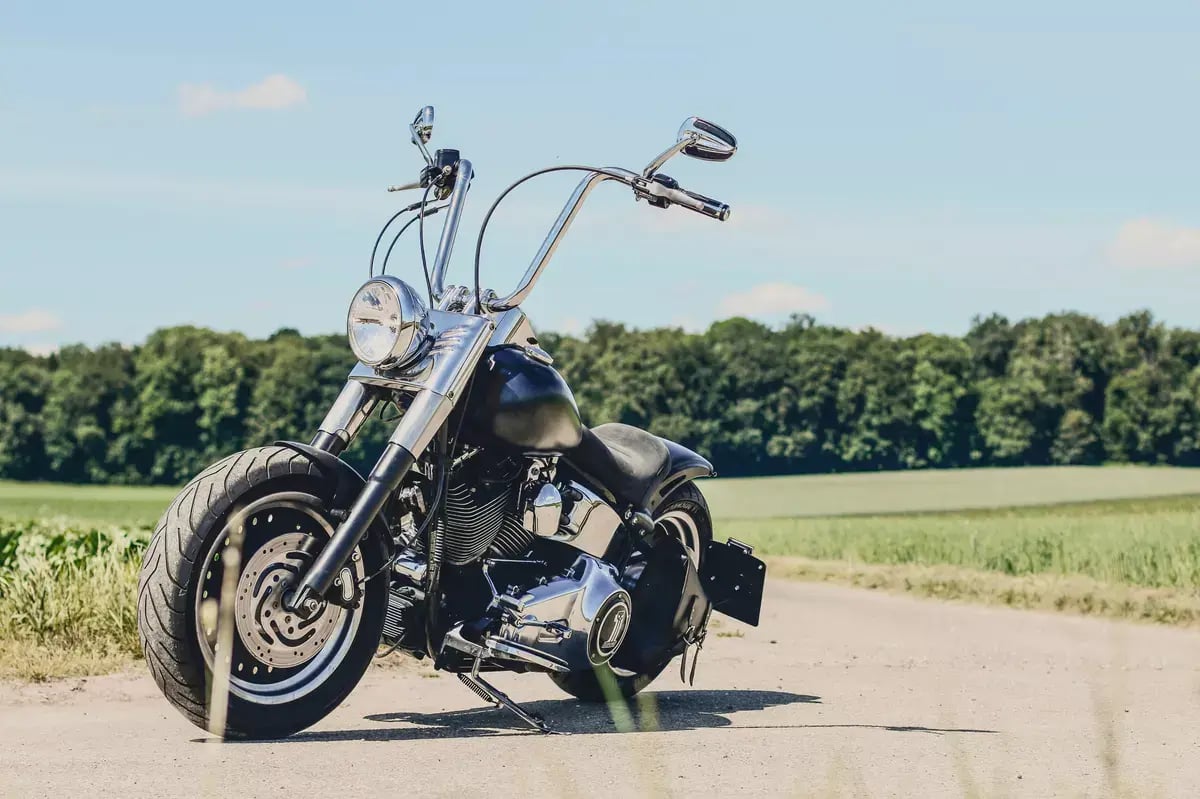
black motorcycle without a driver stands on a dirt road, sideview

TL;DR

Unlock your Harley's true potential with Screamin’ Eagle® performance upgrades, from Stage I to Stage IV. Each stage offers increasing power, torque, and throttle response—backed by Harley’s warranty-friendly engineering. Find the right fit for your ride and lifestyle.

  • Stage I – Intake, exhaust, and tune: better sound, response, and up to 10% more power.
  • Stage II – Cam upgrade: torque or horsepower boost tailored to your riding style.
  • Stage III – Big bore kit: more displacement, more compression, and up to 35% performance gain.
  • Stage IV – Full top-end build: max out power, flow, and Harley-Davidson performance.
  • Warranty-safe – Screamin’ Eagle kits protect your factory coverage.
  • Costs range from $1,000 (Stage I) to $10,000+ (Stage IV), depending on parts and labor.
  • Designed by Harley, for Harley—no compatibility headaches.

If you’ve ever said “No thanks” to more torque and horsepower, you might not be riding a Harley‑Davidson®. Since the beginning, H‑D® has been about that adrenaline rush you get when power meets throttle. For many, the journey doesn’t end with stock performance—riders want more. That’s where Harley Stages come in, especially the official Screamin’ Eagle series.

Before you dive in, here’s what you need to know.

These Harley Screamin’ Eagle upgrades are designed by Harley itself. They’re engineered to play nice with your bike’s factory setup. And—if done through Harley’s programs—they often don’t void your powertrain warranty.

The streets get louder, the curves get tighter, and your ride gets more character. The only real question is: How much power do you want?

Here's the basics of what you'll be getting with each upgrade stage:

Stage I – Move More Air & Fuel

What Is Harley Stage 1 Upgrade?

Harley Stage 1 upgrades kick things off with breathability. In simple terms, this means installing a high‑flow air filter or air cleaner and swapping in freer‑flowing exhaust or slip‑on mufflers. It also means re‑tuning the engine (ECU or ECM flash/tuner).

With Stage 1, you’re improving how your Harley handles air in, fuel delivery, and exhaust flow. This all gives you that growl, that pull, and an all‑around more responsive ride. This level of upgrade is perfect for anyone wanting solid gains without opening up the engine.

It’s one of the most popular Harley stages.

Performance Gains & Feel

  • Expect about 5‑10% increase in horsepower and torque depending on your specific Harley model.
  • Throttle response sharpens, the exhaust note deepens, and even everyday acceleration (off the line, passing) gets noticeably better.
  • Visual appeal: upgraded air cleaners, slicker pipes, and those signature Harley Screaming Eagle parts add style.

Harley Stage 1 Upgrade Cost

  • Parts for a Stage 1 kit often run $1,000 to $1,500 for quality components.
  • If you pay for professional installation and tuning, add extra—labor can add several hundred dollars more.
  • Doing it yourself helps cut cost, if you have basic tools and mechanical comfort.

Stage II – Give It a Lift

What Is Stage 2 Harley Davidson Upgrade?

Once you’ve done Stage 1 (if you want full gains), Stage II goes deeper. You start modifying internal components like the camshaft, adjustable pushrods, sometimes lifters.

The goal? Shift the performance curve: more torque in specific RPM bands (low‑to‑mid or mid‑to‑upper), depending on your riding style. That means better passing power, stronger roll‑on throttle, more aggressive breath; basically lifting the ceiling.

What To Expect in Stage II

  • Choose a “Torque” Stage II cam for punch off the line or a “Power” Stage II cam for higher revs.
  • Increased valve lift/duration lets you squeeze more from each combustion cycle.
  • You’ll want matching hardware: pushrods, maybe upgraded lifters or springs, and of course proper tuning.

Cost & Considerations

  • Stage 2 upgrade kits themselves (cam/pushrod etc.) often cost $400‑$600 or more depending on brand and model.
  • Labor can add significantly: cam installation is more involved, may require 5‑8 hours depending on your bike.
  • Total Stage II cost often lands in the $1,000 to $1,500+ range (parts + labor + tuning) if done professionally.

Stage III – Pump Up the Volume

What is Stage III Harley Performance?

Stage III is when you start pushing displacement, compression, and internal upgrades. Think big bore kits, high compression pistons, stronger valves, aggressive cam profiles, and upgraded heads. This is for riders who want serious numbers and aren’t shy about engine work. These modifications move you well beyond bolt‑ons.

Performance & Trade‑Offs

  • Gains of 25%‑35%+ over stock in many cases — depending on how aggressive parts are.
  • Far superior high‑RPM performance, much stronger mid‑range too.
  • More heat, more maintenance, may require upgraded cooling, stronger drivetrain components, possibly clutch upgrades.

Investment Required

  • Parts alone can run $1,600‑$2,500 or more depending on how much displacement and which brands you go with.
  • Add labor: since you're opening up the engine, machine work is needed. Expect hundreds of dollars more depending on the shop.
  • Tuning becomes even more critical to make sure you don't damage the engine, especially under load or at high revs.

Stage IV – Top it Off

What Does Stage IV Harley Stage Do?

This is the top shelf, the “cherry on top” stage. With Stage IV you’re combining everything:

  • maximum displacement,
  • highest compression,
  • top‑end flowing heads,
  • possibly larger throttle bodies,
  • performance cam, and
  • every supporting piece you need (fueling, ignition, cooling, stronger drivetrain, etc.).

Harley Stage IV upgrades are for riders who want the absolute best in Harley‑Davidson performance and are ready to pay for it.

Gains, Experience & Commitment

  • Huge pull: off the line, mid‑range, and upper RPM — this is serious performance on tap.
  • Loud, aggressive sound. Way higher performance means you’ll feel everything: vibration, engine heat, maintenance intervals shorten.
  • Can push beyond what stock support systems are designed for. You need high‑flow fuel, maybe upgraded oil pump, upgraded cooling, etc.

Harley Stage 4 Upgrade Cost

  • The cost for this level is quite substantial. Parts + labor + tuning + supporting mods can run $3,000‑$10,000 or more depending on how extreme you go.
  • Reliability and rideability need extra attention. Stage IV is commitment: for serious riders who plan to use the power and maintain it.

Which Stage Is Right for You?: Putting it All Together

  • If you ride mostly street and maybe some highway— Stage I gives you big gains for relatively little investment.
  • Want more torque/power in certain RPMs (for passing, hills) — Stage II might be your sweet spot.
  • For long rides, open roads, performance feels in every gear — Stage III gives you that next‑level punch.
  • If you want to show off, drag off the line, go full throttle, push the limits — Stage IV is where it gets wild

Final Thoughts: Power Is Personal

Harley‑Davidson makes it easy to find your level of performance. Whether you’re just wanting an earful of rumble (Stage I), or dreaming of owning a Stave IV beast, the journey is modular. Start where you are, plan where you want to be, and let each stage build on the last.

Riding is about confidence, and when your bike responds to your will — that’s freedom. Choose the stage that matches your riding life. Then, twist the throttle and feel it.

At Southside Harley-Davidson, we know performance isn’t just a number—it’s a feeling.

Whether you’re chasing more torque, craving that deep rumble, or ready to unleash the full potential of your ride, rely on Southside. Our team is here to help you build it right with genuine Harley Screaming’ Eagle® performance upgrades. From Stage I to Stage IV, we’ll make sure your Harley delivers the kind of power that moves you—on and off the road.

Browse our collection of Harley-Davidson motorcycles here.
Topics: Screamin Eagle Performance, harley davidson


6 Tips For Riding Your Motorcycle In The Cold

Posted by Dan Novit

Oct 17, 2018, 4:20:41 PM

1303-crup-01-o+winter-ride-guide+bikes-in-snow

Indiana weather can sometimes be tricky to predict, but this morning was a dreadful reminder that colder weather is most certainly on the way. For many motorcyclists, this first annual encounter with the morning frost can often mean that it's time to start thinking about sending the baby into hibernation until spring rolls around. But still, there are quite a few riders out there who aren't ready to submit to the winter wrath quite yet- and it's A-okay to keep riding through the season, as long as it's done safely. 

The Cold, Hard Truth.MC-Snow-300

First, we need to acknowledge the dangers and risks associated with riding in the cold. If you've ever journeyed out into the brisk, fall breeze unprepared, you were likely quick to regret not tuning in to Fox59 that morning for the weather. Not only is riding in the cold extremely uncomfortable without proper gear, but your body and mind are also at a significant disadvantage when your body temperature drops. Even if you think you're feeling good, colder temperatures will often result in:

  • Shivering
  • Slower reaction times
  • Impaired judgement
  • Low energy
  • Stiff joints and muscles

All of which make you a hazard to yourself and others out on the road. Of course, the last thing we, at Southside Harley, would ever want to do is discourage anyone from riding. So, with enthusiastic support for our die-hard riders out there, we've thoughtfully assembled a list of riding tips that will help you stay safe and warm, should you choose to motor through the bitter days ahead.

Tips For Riding Safely In The Cold

1. Choose Your Underwear Wisely

Wearing thermal underwear will help your body retain heat in all the places that matter. This will help you stay warm without the need to layer on several additional pieces of clothing that may restrict your body's movement while riding. We recommend The Harley-Davidson® FXRG Base Layer Pant and Base Layer Tee. These under-layers from the FXRG Collection were designed with some pretty incredible smart technology that actually help to regulate your body's temperature.

Check out the video for more information about the FXRG Under Layer:

See the full FXRG Collection for HERE (in-store availability may vary)

2. Invest In The Gear That Matters

Sometimes there are benefits to spending a few extra bucks on good quality gear that is actually designed for riding. You can throw on your thick, toasty pair of snow-blowing gloves, but will your hands and fingers be nimble enough to operate your controls?

Treating yourself to a proper riding jacket will also help make those cold rides quite a bit easier. The material you choose for your jacket is typically a matter of preference. Some riders will say that a waterproof, textile jacket will be your best bet to keep you warm without restricting your movements. But Harley-Davidson has introduced some pretty wicked innovations to their leather jackets which make them a mentionable option, as well.

Check out some of the recommended cold weather gear we've got in stock at Southside Harley!

SHOW ME SOME GEAR!

close up of  water plastic bottles on  white background with clipping path3. Stay Hydrated

Unlike the summer time, we don't always thirst for water when it's cold outside. That can become a problem if we don't recognize that our bodies still need water to function at 100%. Make sure you drink plenty of water before and during your ride. 

4. Skip The Morning Joe

Coffee is a great way to start a crisp, winter morning- but not necessarily if you're planning on riding. It may hit the spot and warm your spirits, but drinks like coffee increase your blood flow to the skin to make you feel warmer, but you're actually losing body heat. Best to stick with water or drinks with electrolytes to keep you truly hydrated for the ride. Waitress making cup of coffee in cafx92xA9

5. Eat Like A Champ

Because our metabolism slows down when it's cold, our body begins to shiver to generate heat inside of us. Eating hardy, nutritional foods will keep you warm while calories are burned. Foods with anti-oxidants and immune-boosting properties will help you feel warm while you ride. While eating hot foods make you feel warm in the moment, a piece of fruit can be just as beneficial, if not more.

Delicious prepared and decorated food on table in restaurant

6. Stop Frequently

If you're planning on being on the road for a while, make sure to make plenty of stops to warm yourself up. Taking breaks will give you the chance to stretch out and get the blood flowing through your body again. Take this time for a quick self-assessment of how your fingers and toes are feeling. If you can, try to stop at rest stops along your route to use hand dryers in the restrooms to warm your fingers. 

You May Spend More, But It Won't Cost As Much

In the end, making the decision to ride through the winter- or at least for some colder months- takes a bit of preparation and, yes, perhaps a little bit of money. But your rides will be much more tolerable and- dare we say- enjoyable. By committing to a few upfront expenses and inconveniences, you're actually investing in the safety of yourself and others out on the road- and that's something we can all afford.


Topics: Riding Gear, Indiana Riding, harley davidson


10 Must See Roadside Attractions Between Indianapolis & Milwaukee

Posted by Dan Novit

Aug 13, 2018, 5:17:26 PM

Harley-Davidson's® 115th Anniversary Celebration is just around the corner and, on August 27th, Southside Harley will be welcoming the riders from the Southeast H-D® 115th Anniversary Ride Home to Milwaukee. Our dealership will mark the start of the final 280-mile homestretch to the motherland, as riders will depart here on the morning of Tuesday, August 28th and travel Northwest (for one final stop with our friends at Calumet Harley-Davidson ), then shoot up to Wisconsin and into official H-D territory.

Of course, one of the most fascinating things about a long ride- especially when surrounded by unfamiliar scenery- is the surprise of stumbling upon an intriguing roadside oddity that catches your gaze. Sometimes it's worthy of only a passing glance and the murmur of a "hmm." But others may warrant a minor detour to investigate further.

Well, ladies and gentlemen, the Midwest is known for some of America's most unique and iconic roadside wonders, and we've got a list of the top 10 must-see attractions along the road from Indianapolis to Milwaukee.

1. Giant Lady's Leg Sundial (and nudist colony)

A 63 foot womans leg comes up from the ground. It is a sundial.

Located in Roselawn, Indiana, a site known as Sun Aura has bounced between owners a few times since opening in 1933. But, even through several changes in management, one thing has always been missing from this quaint little camp: clothing. That's right, residents and visitors to Sun Aura should be prepared to experience maximum exposure at any given moment.

Although, tourists aren't typically attracted to Sun Aura for the prime people-watching opportunities; rather the 63 foot-long Giant Lady's Leg Sundial. Ideal for the under-accessorized nudist, the gigantic woman's leg is positioned perfectly for an accurate time-reading based on the sun's position.

Now, don't get us wrong, visitors to the site have been quick to reassure that nudists typically roam a considerable distance from the leg itself, and are quite respectful of tourists who wish to remain fully clothed. 

Address: 3449 E. State Road 10, Roselawn, Indiana

Directions: I-65 exit 230, then west on Hwy 10 for three miles. The nudist camp is on the left, near a pale yellow mailbox and sign.


2. The King of Popcorn (but you're not allowed to call him that)

Unbeknownst to many, Orville Redenbacher's gourmet popcorn empire began in the Indiana city of Valparaiso. Redenbacher settled in the area and grew his businesses before relocating to Colorado. Orville passed away in 1995, but to the city of Valparaiso, Redenbacher was a local celebrity. In 2012, they enlisted artist Lou Cella to create a bronze, spitting-image statue of Redenbacher- bow-tie, goofy glasses and all.A bronze statue of Orville Redenbacher sitting on a park bench.Though he's known well for his wardrobe and style while promoting gourmet popcorn, it technically doesn't really belong to him. His signature look actually belongs to food giant ConAgra Foods, who refused to allow the city of Valparaiso to make any popcorn references in the statue. Jerks.

Address: 63 Lafayette Street, Valparaiso, Indiana

Directions: The statue sits beneath the gateway into Lincoln Park, on the south side of W. Lincolnway/Hwy 130 just east of Lafayette St.


3. The King of Pop (but no corn)

A black and white portrait of Michael Jackson

Get it? Okay- we'll spell it out for you. While Valparaiso pays homage to the King of Popcorn, a tiny house in a small Gary, Indiana neighborhood marks the birthplace of the one and only King of Pop, Michael Jackson. The home itself is not extravagant by any means, but visitors note that the property is maintained beautifully, though the surrounding neighborhood is mostly abandoned and run-down.The home that pop legend Michael Jackson was born in and a granite monument with his image on it is in front of the home Still, the large, granite monument in the yard is a powerful symbol of Jackson's journey from humble beginnings to world-renowned stardom.


Address: 2300 Jackson Street, Gary, Indiana

Directions: I-80/94 exit 10. Drive north on Broadway for four blocks, turn left onto W. 23rd Ave. for six blocks. On the left, just past Jackson St.
 
4. America's Most Haunted Cemetery (or so they say)

As you cross over to the other side (of the border- we mean the border), you can find the next attraction just West of 294 in the town of Midlothian- though it's not for the faint of heart. Bachelors Grove Cemetery's first burial was back in 1844, but reports of strange, paranormal happenings didn't begin until the 1960's. It was around this time that vandals began to wreak havoc on the abandoned burial ground. Some say that hauntings began here as a result of these mischievous disturbances, but no one can truly be certain.An eerie image of a forest with tombstones taken at Bachelors Grove Cemetery

While the cemetery itself has become a paranormal hot-spot, sightings and strange apparitions have plagued passers-by along nearby roads and trails. In the 1970's, two forest preserve officers reported seeing the ghostly silhouette of a horse and plow emerging from a mossy pond adjacent to the cemetery. The officers later learned the legend of an 1870's farmer who became tangled in the reigns of his horse and was then dragged into the water to his death.


Address: 143rd Avenue, Midlothian, Illinois

Directions: Off the beaten path a bit. I-80 exit 148B. North five miles on Hwy 43/Harlem Ave. Turn right onto 143rd Ave. and drive 1.5 miles. Turn left and park in the Rubio Woods parking lot. Walk back to 143rd Ave., look to the right, and see the large phone towers. Cross the road to the south side. The trail to the Cemetery is just to the right of the towers, leading to the right and south, back into the woods. Follow the trail for a quarter-mile, and the cemetery will be on the right.
 

 5. World's Largest Stained Glass Window

The worlds largest stained glass window at Resurrection Cemetery in IllinoisYour next attraction is due North a bit on 294 and happens to be yet another cemetery in the town of Justice, Illinois. While there are reports of paranormal happenings here, Resurrection Cemetery is also known for something of more significant beauty: the world's largest stained glass window. The window is recorded by the Guinness Book of World Records as being 22,381 square feet in area and assembled from 2,248 individual panels of glass. The art features significant events from history, including the Garden of Eden, Atomic Explosions, Airplanes, Skyscrapers and even depictions of space exploration.

Address: 7200 Archer Road, Justice, Illinois

Directions: I-55 exits 282 or 282-A. East across the river on Hwy 171/Archer Ave., then bear right and continue south on Hwy 171. Resurrection Cemetery entrance is on the left at 71st St. The Mausoleum can easily be seen from the road.
 

 6. Al Capone's Grave 

A black and white picture of gangster Al CaponeOkay, okay- last graveyard, we promise. But this one is much more historically relevant. Hillside, Illinois is home to Mount Caramel Cemetery, the gravesite of one of America's most notorious gangsters: Al Capone. You can't miss the gigantic Capone family monument on the grounds, which makes for a great photo opportunity. Visitors to the site will sometimes pay their respects to Capone by leaving pennies, booze, or other trinkets on his grave.

 Address:1400 S Wolf Rd, Hillside, IL 60162

Directions: Enter Mount Carmel Cemetery from Roosevelt Rd and make a right. It's about six graves down and on the right side. A large grey headstone reads "Capone."


7. The World's First McDonalds

In 1955, Ray Kroc opened his very first McDonalds restaurant in Des Plaines, Illinois. Kroc considered this particular restaurant to be his favorite, and it was continuously updated and remodeled until 1984, the year that Ray Kroc died. In 1985, the location stopped serving food and was rebuilt as an identical match to the original 1955 design. But, don't expect to buy a Big Mac here- the location no longer serves food. A picture of the first McDonalds restaurant to open

Up until 2008, visitors could enter the building to explore the McDonalds franchise history and to be reminded of Ray Kroc's legacy. But, due to continuous flooding in the area, the restaurant and it's nostalgic interior can now only be viewed from the outside. Still, it's a great opportunity to stand in the presence of some true, American history.

Address: 400 Lee Street, Des Plaines, Illinois

Directions: On the west side of Lee St./US Hwys 45 & 12, just south of where US Hwys 45 & 12 split, and just north of US Hwy 14/Miner St.
 

8. Cheese Castle? Yep- Must Be Wisconsin

If you've ever driven up I-94 into Wisconsin, you've likely noticed the Mars Cheese Castle once you approach the Kenosha area. If you haven't taken some time to explore the castle, it's well worth the detour! Of course, you can expect a royally generous cheese selection, but the castle boasts a full restaurant and bar, a gift shop, and some truly unique photo opportunities. The mars cheese castle located in kenosha wisconsin


Directions: I-94 exit 340, on the southwest side of the freeway.


9. A Really Big Bull 

A giant bull sitting in front of a car dealership

This next attraction has absolutely no historical significance, but there's just something about a 15-foot tall bull sitting in front of a car dealership. The giant steer- and apparently two of it's siblings- belonged to a restaurant called Black Angus, but now this one works in vehicle sales at adjacent car dealership, Frontier Motor Cars. The story behind the bull is a bit vague, and it's difficult to pinpoint exactly what the inspiration behind the piece was, but it's still an unusual find. Just stop by and take a photo- there's no other place you can find this much bull outside of your office.


Address: 5150 South 27th Street, Milwaukee, Wisconsin

Directions: Frontier Motor Cars, East side of S. 27th St. just south of Edgerton Ave.
 

10. The Bronze Fonz

Your last roadside attraction will take you a bit further beyond the Harley-Davidson Museum, but you can't say that you truly experienced Milwaukee until you've met Arthur Fonzarelli. You likely know him best by his nickname, "The Fonz," from the iconic television show, Happy Days. Sadly, you won't find Henry Winkler strolling along the Milwaukee River Walk (though he did attend the unveiling of his statue), but instead, a bronze statue commemorating the classic, fictional Milwaukee native.Henry Winkler posing for a picture beside a bronze statue of Arthur Fonzarelli, also known as fonzie, from tv show happy days.Known to the locals as The Bronze Fonz, the statue was completed in 2008 by sculptor Gerald Sawyer, in all bronze to resemble an Oscar statue. But, just before the unveiling of the statue, the city of Milwaukee decided they wanted The Fonz to be portrayed with his iconic leather jacket and white undershirt.Now, spectators are free to stroll along the Milwaukee River Walk and pose for a photo with the one and only Arthur Fonzarelli- and no trip to Milwaukee would be complete without it.

A bronze statue of arthur fonzarelli from tv show happy days in milwaukee wisconsin


Address: 117 East Wells Street, Milwaukee, Wisconsin

Directions: Milwaukee River Walk just south of Wells Street. East side of river. FROM THE SOUTH: I-43 exit 72C. At the end of the ramp turn right onto 6th St., then make an immediate left 
onto Wells St. Drive three blocks, cross the river, and the Fonz will be on the far side, on the right. FROM THE NORTH: I-43 exit 72E. Drive south three blocks, then turn left onto Wells St. Drive three blocks, cross the river, and the Fonz will be on the far side, on the right.


Topics: Rides, Road Trip, harley davidson


Comments